guides
Last update:23 July 2020
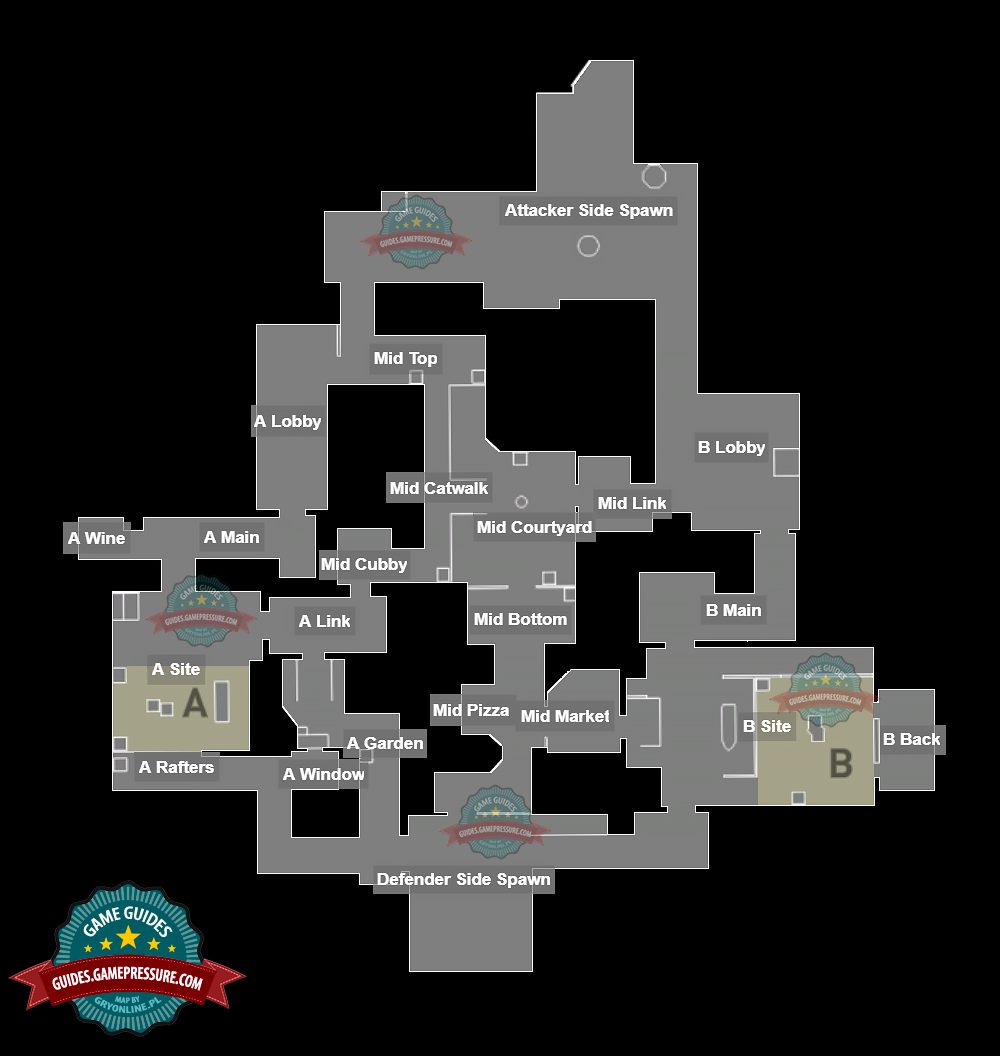
This chapter of theValorantguide is dedicated to Ascent.
Below are some of the best defensive spots forA.
A Rafters
Rafters (aka Heaven) is one of the best defensive spots on Ascent.
The image above shows a player standing at Site A Rafters.
From here he can observe two often-used approaches to A, namely A Main and A Link.
A Site and A Doors
At A, there is a single automatic armored door.
After a short while, the door will be activated.
If the door is destroyed, it will stay that way until the next round.
The door can be opened or closed from inside only.
Using this shortcut, players can gain from a few to even several seconds.
The image above shows a player standing in front of an elevation leading to a well-camouflaged window.
The window can be broken with a knife or a single projectile and opens a passage to A Rafters.
A Main
A Main is another popular defensive spot on Ascent.
Behind the wall on the right is a shallow recess in which one of the opponents can also hide.
In the image above, a player can be seen pointing in the direction of passage to A Lobby.
If necessary, that player can quickly open fire or hide behind the solid wall.
Mid Bottom
Mid Bottom is the most important point on Ascent.
Mid Cubby
Mid Cubby is a narrow passage leading to site A.

Behind the wall on the left is the Catwalk - a long walkway leading to the A Lobby.
Mid Link
Mid Bottom is the most important area on Ascent.
Attackers can access it from Mid Link.
The image above shows a character standing at Mid Link.
From here, you could proceed in the direction of A Lobby or Mid Cubby.
Mid Catwalk is one of the routes leading to site A.
A Link
A Link is one of the locations that lead to site A.
Another possibility is simply to rotate to another strategic point on the map.
By choosing the first option, players will have to get through a narrow corridor.
A Main is a narrow corridor that can be accessed after passing through A Lobby.
Site A is just behind the wall and to the left.
Site A
Site A is one of the locations where the attacking team can plant a Spike.
There are two roads to this point - A Main and A Link.
Both the boxes on the right and the canvas can be successfully penetrated with bullets.
Under A Rafters there is a free space in which the opponent can also lurk.

Another convenient place to hide is a large-sized metal fan on the left side.
Below are some of the best defensive spots forsite Bon Ascent.
In case of danger, the player can hide behind a wall or move to Mid.

B Doors
There is one automatic armored door at B plant site.
After a short while, the door will be activated.
If the door is destroyed, it will stay that way until the next round.

The door on point B opens and closes only from the inside.
If necessary, the player can turn around and descend to the plant site.
B Back is also where opponents hide after successfully planting a charge.
To the left is a roofed building with a recess, and behind it is the plant location.
First jump on the crates, then create a Barrier Orb under you.
The character will be lifted up from where it will have a perfect view of the B Site.
This site is not associated with and/or endorsed by the Riot Games or Riot Games.
All logos and images are copyrighted by their respective owners.
